Showing posts with label start to finish. Show all posts

Monday, September 24, 2012

Monday Making Your Own Stacking Embellishments

Happy Monday!

Did you have a nice weekend?  We had a wonderful time!  Saturday was just extremely relaxing!!  I loved every minute of it.  Then on Sunday my mom and I  went shopping at the outlet mall and found some really awesome bargains and then we came home for lunch.  Then after lunch we left hubby at home and my mom and the boys and I went to a couple of fall festivals to get fall mums and pumpkins!  We had such an awesome time!!

Back in July Cord Scrapbook Studio gave me the Monster Mash collection to work with and I just had so much fun!  This is a super quick card I made using the paper and a sticker.  For the center piece I made my own stackable embellishment,
I first used my circle punches and made 3 circle punches.  I then placed my sticker on the smallest circle.  
I then placed my foam tape on the back of that piece and stacked it on top of the black circle.
I then repeated the foam tape on the black of the black circle
and placed this layer on top of the scalloped piece.
Here is a look at the layers.
I then placed that on top of my card!

supplies
cardstock- bazzill
paper- sticker- imaginisce
buttons- paper trey ink

I have tons of Halloween to share with you this week.  Like I said I have been working on Halloween since July.  I am so excited to finally share it all!!  See you tomorrow!  Have a wonderful and crafty day!
mp

Monday, July 16, 2012

Monday Kite Tails

Happy Monday!

Did you have a great weekend.  We did here!  We didn't get the much needed rain but it did cool off a bit.  Thursday was our wedding anniversary.  We really didn't do anything but Friday my mom watched the kids and we went to the Fraze, an outdoor concert area, and we saw Ambrosia.  Remember for those of you that were around in the 70's the pop music- How much I feel, Your the only woman and Your the Biggest part of me!  I just loved roller skating to them!  Well we went out to eat and then went to the concert.  It was so much fun!  Ambrosia was awesome!  Loved it.  Then on Saturday and Sunday  we just hung out at home and relaxed and played with the kids!

Last week I was up over at Kite Tails Designs.  I had a tutorial on misting and masking.

Have you every tried making a mask using your Silhouette?  Well, it is really fun and very easy!  For my layout I used the Kite Tails Luck O' collection and I wanted a mask that had a sort of Celtic feel.  I found a Celtic Knot design and cut that out to a 12x12 size.  Here is a close up. (Sorry about the shadow)
I then placed this mask on my white cardstock in a box and sprayed my mist.
I let that dry and then made my layout.  

I wanted the mist darker in the top right and lower left .  I really had a fun time making my own mask!  Try it some time.  I think you will really love it!

Supplies
cardstock- bazzill
Everything else is Kite Tails Designs- Luck O'
mist- Mister Huey by Studio Calico

Thanks so much for stopping by today.  I will be back tomorrow with a new project.  Also you are going to want to be sure to check back here later in the week because I am going to be having a blog celebration with my 500th post!  I am so excited.  I will give a hint- Flair! My new favorite embellie!!! You are not going to want to miss a minute!

Have a wonderful and crafty day!
-mp

Monday, July 9, 2012

Monday Start to Finish Home Decor Item


Happy Monday,
Did you have a nice weekend?  We did.  Saturday we had family over.  The weather was terrible- sunny and 103 degrees.  This is way too hot for me.  I stayed inside. LOL!  Sunday I was able to get some crafting time in.  I have a little bit of a break from commitments and I am starting on some scrappin' just for myself.  I love this!!

Last week I made a home decor piece with the Moxxie Hometown Celebration collection.  Several weeks before I had made another home decor piece for Cord Scrapbook Studio.  I used the Little Yellow Bicycle Hello Spring Collection.

1.  I used the Build a Flower kit from LYB.  Everything is already cut and ready for you.  All you have to do is assemble them.
hs-305_400pxls.jpg
2,  Next I picked up some straws at the Dollar Store and some floral tape.  I wrapped floral tape around the  straws starting at the bottom and working your way up to the top.  These will create the stems of the flowers.
Here is a look at the stem almost done.
Here is a look at all my stems with the flowers.
Next put a huge glop of hot glue on the back of each flower.  
Place your steam in the center of the glue and put a dab of glue on top.  

Here is a look at the all the different types of flowers.  Let these dry and it is time to start making the baske.
3.   I created my floral basket using my Silhouette. It is a Lori Whitlock design.
I glued it together using my glue gun.  I used a sheet from the Hello Spring.
4.  Next I bought some floral foam from the dollar store and cut is so that it filled the bottom of the floral basket.  

5.  Now that the flowers are dry cut the bottom tips off the flowers just like you would a real flower on a slight angle.  This will make it easier for you to insert the straw- steam into the foam.  

Add some leaves to the flowers and glue those on and place arrange the stems and flowers into the basket.
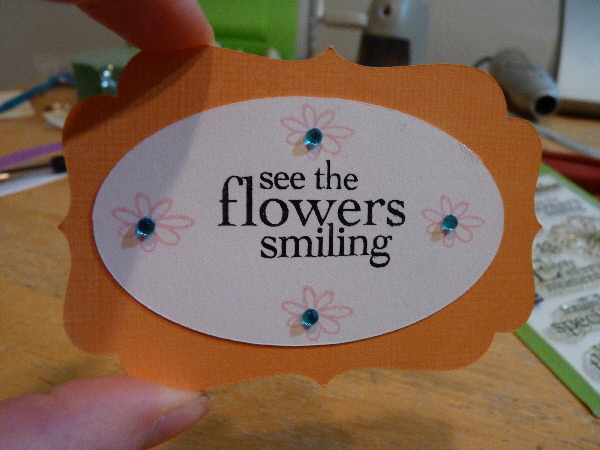
6.  I made a label for the front of the basket and stamped it using my Hero Arts stamps and some bling.  You always need a little bling- right????
7.  I bought some floral moss to add to the basket to cover up the basket so that you don't see any of the floral foam
Fill in any gaps with the floral moss.
Here is the final project.  Isn't just the cutest?  I just love it.  The perfect flower arrangement and these won't die! LOL!!
Supplies
Everything but the label is Little Yellow Bicycle.
label- Paper trey Ink
stamps- Hero Arts
bling- Hero Arts
ink- Hero Arts
I hope you enjoyed this Start to Finish Project today.  I will be back tomorrow with another new project.  See you then!

Have a wonderful and crafty day!
-mp

Tuesday, June 5, 2012

Tuesday Start to Finish with Moxxie!

Happy Tuesday!

Yesterday over on the Moxxie blog was my debut!!  So I thought I would share my work here as well!  So let's get to it- o.k.??

Whenever I start a project I always make a sketch first.  So today I am going to share one of my sketches.
With this sketch I knew I wanted to work with the Faith Collection.  Jack is going on 7 years old and I had never found the perfect paper to scrap his Baptism.  Well, Moxxie had it.  This line is perfect and the name of the collection says it all- Faith!

So with the sketch I cut out all my different layers of paper and I sewed around the edges. You can't really tell that I machine stitched around the edges-- but I did. 
Next I knew I needed to add a bit of mist and paint.  With the way the sketch was designed I wanted to keep the visual diagonal going on the paper so I added some paint in the top right and the bottom left.  I added 3 different colors from Mister Huey by Studio Calico- Heirloom Blue, Powder Blue and Shine.  These colors really matched the paper well.

I liked how the colors really pop on the light paper.

Now it was time to add all the pieces together.
The border strip is one of the Faith collection Die Cut Border strips.  It worked perfectly.  I love how everything looked so I glued everything down and all I need to do was add my photos, title, and journaling.

Here is the final look!
I really liked how it turned out!

Hope you enjoyed my Start to Finish with Moxxie!  I will have a new Start to Finish every month with a new sketch!

I will be back on Thursday with a new project!  Thanks for stopping by.  Have a wonderful and crafty day!
-mp


Tuesday, May 22, 2012

Tuesday Spring Wreath

Happy Tuesday!

How is your week going?  So far so good here but I have been struggling with either a cold or allergies- I am not quite sure.  Whatever it is it sure is kicking my butt! 

As I mentioned yesterday one of my assignments from Cord Scrapbook Studio was to create using the Bo Bunny Ambrosia line.  Yesterday I shared the layout and today I want to share my home decor piece.  For this Spring wreath I used my Silhouette to create all the layered flowers.  I cute out 74 flowers in different pattern papers. Here are directions to create this beautiful wreath.


Instructions:
  1.  Start with a 12 inch base- I used the base from Michael's.
  2. Cut flowers out of 3 coordinating pattern sheets of paper.  I used a 2.5 inch 3 layer flower from my Silhouette.
  3. Cut 1-12 leaves.
  4. Arrange on the base alternating patter paper and color. 
  5. Tuck the leaves randomly around the wreath.
  6. Use any fake flowers that are seasonal and glue on. 
  7. Cut a coordinating element.  I used a 5.5 inch butterfly from coordinating cardstock.  I also cut a second image out of thick cardstock to give the butterfly a little substance and glue on top of the flowers. 
  8. You can make this for any season.  It is so fun to make!


supplies
paper-bo bunny ambrosia
floral wreath base, flowers- michaels
cardstock- bazzill
buttons- paper trey ink

Thanks so much for stopping by today.  I will be back tomorrow with a Wednesday card.  See you then!  Have a wonderful and crafty day!
-mp

Wednesday, April 18, 2012

Wednesday Card from Start to Finish

Happy Wednesday!

Have you been crafty this week?  I haven't really been too crafty.  I would like to be but we just haven't had the time to get downstairs.  I have some great projects on my desk but no time.  I hate it when that happens! 

Today I want to bring you a Start to Finish project today.  One of the sketches that I made for Burlap and Buttercups was for a card.  I love to use my pattern paper scraps on my cards.  This card used a bunch of it!

So for my starting point- I always start out with a sketch that I make.  For my card I decided that I wanted to change up the basic sketch and make my paper strips into different sizes of triangles.  I am really into the ray look and the unevenness it gives.


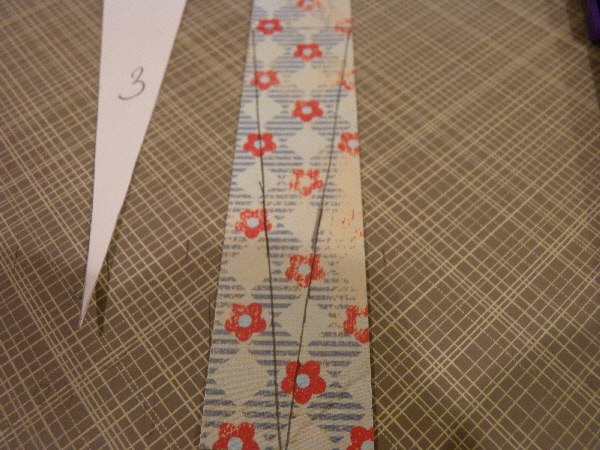
Use a scrap piece of cardstock that is the exact same size as your card.  Using a ruler draw your lines and the pattern you want. 
Then put in numbers so that you know how the pieces fit together.
Next cut out all the pieces and then trace all the  strips on your  pattern pieces of paper.

I like to keep the pattern piece along with the white piece together and in order so that I know how I will arrange them.

Now it is time to put the pattern pieces and arrange them on your card.
Glue all the pieces down.  I then added some machine stitching around the card.  I love to add stitching on my cards whenever I have time.


To make the flower- Start with 2 or 3 different sizes of scallopped circles. Cut them in the same or different pattern paper.

To give the flower a bit of dimension, roll the paper in little balls.
Unfold the flowers and put pop dots  in between the layers.  I added a button for the centerpiece, but you could also add a brad or anything else.
Finished Card- I added a little banner piece with a simple sentiment using a Hero Arts stamp.

Supplies- April kit from Burlap and Buttercups
paper from lily bee, jillibean soup
button- jillibean soup
twine- the twinery
banner- mme
stamp- hero arts
ink- hero arts

Thanks so much for stopping by today.  I hope you enjoyed my Start to Finish on my card.  I am taking the day off tomorrow, but I will be back on Friday with another new layout.  See you then!  Have a wonderful and crafty day!
-mp

Sunday, March 11, 2012

A Layout from Start to Finish

Happy Sunday,

Start to Finish blog posts have become very popular, and I have had several emails about my process and how I work.  So I thought I would let you see how I create.  If you don't want to see all of it just scroll to the bottom to see the end result. 

1.  First I start with my photo. 
2.  Next I pick the paper.  I knew I wanted to use Jillibean Soup's Hearty Barley for this layout.  I also added a couple of older lines to the mix.
3.    Next,  I make a rough sketch of my design.  I carry my paper pad with me at all times because you never know when that idea is going to come to you. 


Here is the main idea of making my photo the center piece and below the photo adding layers of pattern paper. Iwould then add some pattern paper at the top of the page and the bottom leaving the center open.

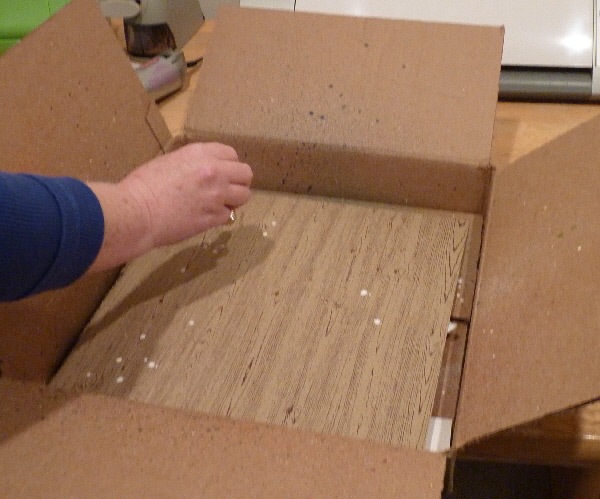
4.  Technique #1 Misting-- Have you tried this technique yet?  If not it is super duper fun!  First, you start with a box to keep the mist from splattering everywhere.
Here is my box-- you can see it has been used A LOT!

5.  Now I like to use Mister Huey by Studio Calico and I like to uncap the bottle and flick the mist onto my paper by tapping the side of the cap.

For this layout I wanted to add white as my base and place the spray droppings in the top left corner and bottom left corner with a couple of drops in the top right.  I then added a bit of red ontop.

6.  It is important to let the paint droppings to dry.  While it is drying I like to set up all my pattern pieces and embellishments.

Technique #2-- Use your pattern paper as embellishments 
I like to use my pattern paper as embellishments.   I love this piece of pattern paper
but I really only wanted to use just a couple of hearts so I cut them out to use as embellishments.

All my pattern pieces and embellishments ready to be used.
7.  Now the fun can begin!!  It is time to build the page.
Here is a look at the misted page before I added the top and bottoms with the pattern paper.
8.  Next I worked on all the layers that will go under the photo.  There is no right or wrong way to layer paper.  It is whatever looks good to you.  I wanted some banner pieces to start out with.
Frugal tip #1-- I didn't have a long enough strip of the light brown polka dot paper so I cut it in half and placed on stripe on each side giving the effect of a long strip.

9.  Next, I layered my photo and mattings on top.
Loved the way it looks so I glued it all down.  For all my projects I like to use the various Xyron Products!

9.  Now embellishment time-- Here are the embellishments that I knew I wanted to use.
Time to build the page.  I like to start with the embellishment cluster near the photo first.  It is just trial and error to see what looks good.

I like my added hearts that I cut out.  They worked out perfectly.

10.  Now time to build the top.

I added some more hearts and then my title.  Love how it looks and time to glue it all down!

The finished page:


supplies
paper and embellishments- jillibean soup
twine- the twinery
mist- mister huey
tools& misc- ek success border punch, foam dots, xyron runner, xyron x

I hope you enjoyed my scrapping process, techiniques, and frugal tips.  If you have any questions please feel free to email me!  I love it when you do!!

Thanks so much for stopping by today.  I will be back tomorrow with a new project.  Have a wonderful and crafty day!
-mp